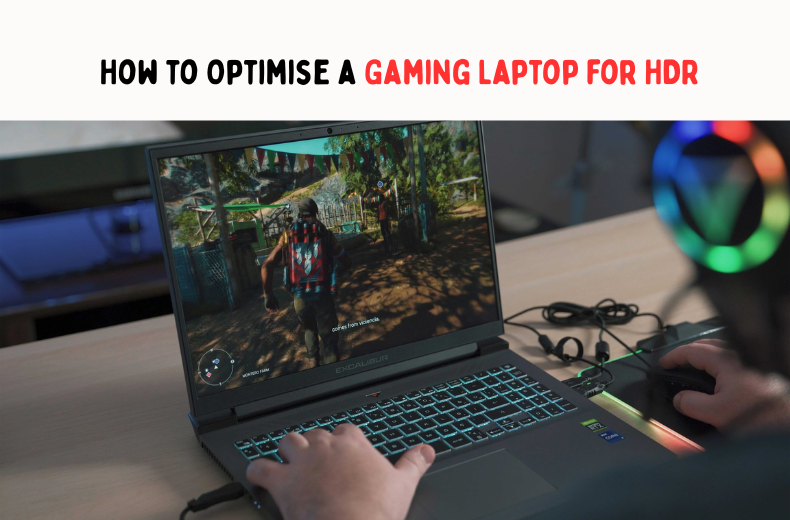
How to Optimize a Gaming Laptop for HDR: A Beginner’s Guide
So, you’ve got a shiny new gaming laptop with a screen that promises breathtaking visuals through High Dynamic Range (HDR). You’re ready to see your favourite games in a new light, with colours that pop and contrasts that pull you deeper into the action by learning How to Optimize a Gaming Laptop for HDR.
But after firing it up, you might find the reality isn’t quite the plug-and-play paradise you imagined. Don’t worry, you’re not alone.
Optimising your gaming laptop for HDR can feel like a dark art, but it’s a skill worth mastering. Night and day are different between a default HDR setup and a properly calibrated one.
This guide walks you through every step, transforming your gaming experience from “meh” to magnificent.
We’ll cover everything from the ground up: understanding what HDR actually is, checking your hardware, diving into Windows HDR settings, calibrating your Display, and even troubleshooting those annoying issues that can pop up.
By the end, you’ll have all the essential tips needed to unlock the true power of your HDR display.
Understanding HDR: What It Is and Why It Matters
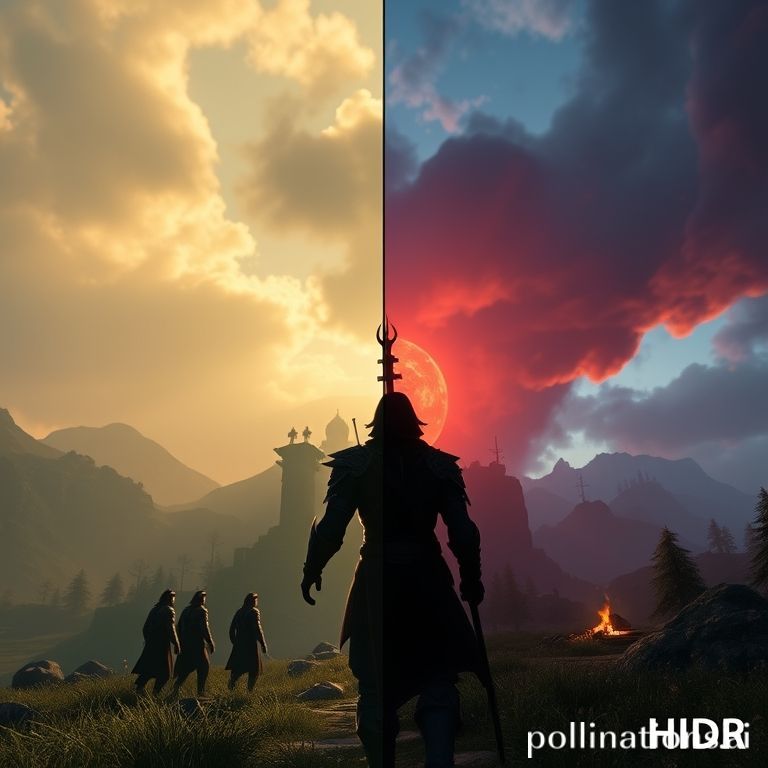
Before tweaking settings, let’s get a clear picture of what we’re working with. High Dynamic Range (HDR) is a display technology that dramatically expands the range of both color and contrast. Think of it as the difference between a standard photograph and what your eyes see in the real world.
A Standard Dynamic Range (SDR) display—the kind we’ve used for decades—is limited in the spectrum of light and color it can show. This often results in “crushed” blacks that lose detail in shadows or “clipped” whites where bright areas like the sun or a reflection become a flat, white blob.
HDR shatters those limitations. It allows for:
- Brighter Highlights: Specular highlights, like the glint of sunlight on metal or the blast from an explosion, can be displayed with intense, realistic brightness without washing out the rest of the scene.
- Deeper Blacks: It provides more detail in the darkest parts of an image, so a shadowy corner in a horror game isn’t just a patch of black—it’s a textured area where danger could be lurking.
- Wider Color Gamut: HDR displays can produce billions of colors, far more than the millions available on most SDR screens. This creates smoother gradients and more vibrant, lifelike hues.
For gaming, this translates into an unparalleled level of immersion. A vibrant fantasy world feels more magical, and a gritty post-apocalyptic landscape feels more visceral. You’re not just playing the game; you’re experiencing its world in a far more believable way.
All steps on How to Optimize a Gaming Laptop for HDR
Step 1: Check Your Hardware Compatibility
Not all gaming laptops are created equal when it comes to HDR. Before optimizing, you need to ensure your machine has the right stuff. This involves both your Display and Displaysplay powering it.
Essential Gaming Laptop Specifications
True HDR requires a display that can meet specific brightness and color standards. When shopping for your laptop, you might have seen terms like “DisplayHDR 400” or “Dolby Vision.” These are certifications that guarantee a certain level of performance.
Here’s a breakdown of what to look for:
| Certification | Minimum Peak Brightness | Black Level | Color Gamut | What It Means for Gaming |
|---|---|---|---|---|
| DisplayHDR 400 | 400 nits | 0.4 cd/m² | 95% sRGB | The entry-level for HDR. Offers a noticeable step up from SDR, but won’t deliver the most impactful highlights. |
| DisplayHDR 600 | 600 nits | 0.1 cd/m² | 90% DCI-P3 | A significant improvement. You’ll see brighter highlights and better contrast, making for a great mid-range HDR experience. |
| DisplayHDR 1000 | 1000 nits | 0.05 cd/m² | 90% DCI-P3 | The gold standard for impactful HDR. Delivers brilliant, eye-searing highlights and deep blacks, often using local dimming. |
Your graphics card (GPU) is also a key player. Modern GPUs from NVIDIA (RTX 20-series and newer) and AMD (RX 5000-series and newer) are fully equipped to handle HDR output.
They support the necessary connections like HDMI 2.0/2.1 and DisplayPort 1.4, which have the capacity required for HDR signals.
HDR-Compatible Display Types
The panel technology in your laptop’s screen makes a huge difference in HDR quality.
- IPS (In-Plane Switching): Known for excellent color accuracy and viewing angles. High-end IPS panels can achieve good brightness for HDR, but their contrast is naturally limited, making black levels appear more gray.
- OLED (Organic Light-Emitting Diode): The king of contrast. Since each pixel is its own light source, it can turn off completely to produce perfect blacks. This makes for an incredibly dynamic HDR image, though peak brightness may not reach the levels of the best Mini-LEDs.
- Mini-LED: This cutting-edge LCD technology uses thousands of tiny LEDs as a backlight. These LEDs are grouped into “local dimming zones” that can be turned on or off independently, allowing for near-OLED black levels while achieving extremely high peak brightness. Laptops with displays like the ASUS ROG Nebula HDR often use this tech.
Step 2: Configure Windows HDR Settings
With the hardware sorted, it’s time to tell your operating system to get on board. Both Windows 10 and Windows 11 have robust HDR support, but it often needs to be enabled and calibrated manually.
How to Enable HDR in Windows
Getting started is simple. Just follow these steps:
- Right-click on your desktop and select Display settings.
- At the top of the window, ensure your laptop’s central Display is selected.
- Display toggle labeled Use HDR and click it to turn it on.
Your screen will likely go black for a second. You might notice your desktop looks… a bit off when it comes back. Colors might seem washed out or grayish. This is normal! SDR content (like your desktop and most apps) doesn’t always look right when displayed in Displaye. We’ll fix this.

While you’re in the HDR settings menu, it’s a great idea to turn on Auto HDR. This fantastic Windows feature uses AI to apply an HDR effect to older DirectX 11 and 12 games that don’t have native HDR support. It can breathe new life into classic titles.
Windows Display Calibration for HDR
This is the most critical part of the setup process. Calibration ensures that Windows knows the exact capabilities of your screen, allowing it to map brightness and color correctly.
Microsoft has a free and indispensable tool called the Windows HDR Calibration app, available from the Microsoft Store.
- Download and Install: Search for “Windows HDR Calibration” in the Microsoft Store and install it.
- Launch the App: Open the app and click “Get Started.”
- Calibrate Black Level: The first test shows a pattern and asks you to move a slider until the pattern is no longer visible. For most high-quality displays (especially OLED and Mini-LED), this will be at the lowest setting (0).
- Calibrate Peak Brightness: You’ll see two more tests for brightness. Again, adjust the slider until the pattern disappears. This tells Windows the maximum brightness your screen can hit for small highlights and full-screen flashes. The value should be close to your Display’s rate (Display’s 00 for a DisplayHDR 1000 screen).
- Calibrate Color Saturation: The final test lets you adjust color fullness. Drag the slider to find a balance where colors look vibrant, but not cartoonishly oversaturated.
- Save the Profile: The app will save this information as a new color profile automatically used whenever HDR is active.
Step 3: Optimize Gaming Monitor Settings
Now we address that washed-out desktop. In the main Windows HDR settings page (Settings > System > Display > HDR), you’ll find a slider called SDR content brightness.
Adjusting Brightness and Contrast
This slider controls how bright non-HDR content appears when your Display is in the default setting, which is often too high, causing a pale, washed-out look.
- Action: Drag the SDR content brightness slider to the left. A setting between 10 and 20 is often a good starting point. Adjust it until your desktop background, icons, and non-HDR applications look normal and comfortable to your eyes.
This single adjustment is the key to happily leaving HDR on all the time.
Color Settings for Enhanced Visuals
You want to ensure your GPU outputs a full-quality signal for the best color reproduction. This is done in your GPU’s control panel.
For NVIDIA GPUs:
- Right-click your desktop and open the NVIDIA Control Panel.
- Go to Change resolution.
- Scroll down and select Use NVIDIA color settings.
- Set the Output color depth to the highest available option, 10-bpc.
- Set the Output dynamic range to Full.
For AMD GPUs:
- Right-click your desktop and open AMD Software: Adrenalin Edition.
- Go to the Gaming tab, then Display.
- Find Tom’s Display and enable it.
- Ensure the Color Depth is set to the highest value (e.g., 10-bit).
This ensures you’re sending the maximum amount of color information to your Display, which is beneficial for gradients and avoiding color banding in HDR content.
Step 4: Upgrading Your Gaming Laptop for Better HDR Performance
While a gaming laptop isn’t as modular as a desktop, there are still ways to improve its performance, directly impacting your HDR gaming experience.
Recommended Hardware Upgrades
Running games in HDR, especially at high resolutions and frame rates, is demanding. Two key upgrades can provide more overhead and a smoother experience:
- RAM (Random Access Memory): Many gaming laptops ship with 16GB of RAM, which is the modern standard. Upgrading to 32GB can provide more room for the OS and background applications, ensuring that large, open-world games have all the memory they need to load high-resolution HDR assets without stuttering.
- Storage (SSD): If your laptop has a slower SSD or still uses a hard drive for games, upgrading to a faster NVMe SSD can dramatically reduce loading times. This is especially beneficial for games that stream assets in real-time, as a quicker drive ensures the beautiful HDR textures load in without delay.
Benefits of External HDR Monitors
The ultimate upgrade for any gaming laptop setup. While laptop screens have gotten incredibly good, a dedicated desktop monitor often offers a superior experience with:
- Larger Screen Size: A 27-inch or 32-inch monitor provides a more immersive field of view.
- Higher Brightness and More Dimming Zones: Desktop monitors, unconstrained by battery life and thermal limits, can often get much brighter and feature more advanced backlights (like FALD – Full-Array Local Dimming) for even better contrast.
- Better Ergonomics: The ability to adjust height, tilt, and swivel allows for a more comfortable gaming posture.
When connecting to an external monitor, always use the best possible cable. A certified DisplayPort 1.4 or HDMI 2.1 cable must ensure you have enough bandwidth for 4K resolution, high refresh rates, and 10-bit HDR color simultaneously.Click here to view sample gaming moniotrs and their reviews
Troubleshooting Common HDR Issues
Even with a perfect setup, you might run into some quirks. Here’s how to solve the most common ones.
Fixing Color Distortion Problems
- Problem: Colors look oversaturated or have a strange tint (e.g., red tint when Night Light is on).
- Solution:
- Check GPU Color Settings: Double-check that your NVIDIA or AMD control panel is set to 10-bit color and Full dynamic range, as described in Step 3.
- Update Graphics Drivers: Outdated drivers are a primary cause of HDR weirdness. Use GeForce Experience (NVIDIA) or AMD Software to install the latest version. Always choose the “Clean Installation” option if available.
- In-Game Calibration :Every HDR game has its own calibration screen in the settings. Do not skip this! Correctly setting the peak brightness (white point) and black point within the game is crucial for accurate color and contrast.
Addressing Performance Lag in HDR Games
- Problem: Your frame rate drops significantly when you enable HDR in a game.
- Solution:
- Update Your Game and Drivers: Performance fixes for HDR are common in both game patches and driver updates.
- Check Display Mode: Ensure the game runs in Exclusive setup Borderless Fullscreen mode. Some games have poor HDR implementation in windowed mode.
- Disable Overlays: Overlays from applications like Discord, Steam, or some monitoring software can interfere with HDR performance. Try disabling them to see if it improves smoothness.
- Leverage Upscaling: Use technologies like NVIDIA DLSS or AMD FSR. Setting them to “Quality” or “Balanced” mode can claw back a significant amount of performance with minimal impact on visual quality, offsetting the HDR performance cost.
Conclusion
Optimizing your gaming laptop for HDR is a journey, not a destination. It requires a bit of initial setup and a few moments of calibration for each new game, but the payoff is immense.
Moving beyond the default settings, you transform your Display from static to a vibrant, dynamic, and immersive view into your favorite virtual worlds.
By following these essential tips—confirming your hardware, mastering Windows display calibration, and fine-tuning your game settings—you are taking complete control of your visual experience.
The stunning sunsets, deep shadows, and explosive colors that game developers intended for you to see are now unlocked. So go ahead, dive in, and prepare to be amazed by what your gaming laptop can genuinely do.