Introduction
Drone photography tricks have taken social media by storm, offering a unique perspective that can truly captivate your Instagram followers. In this post, we’ll explore five drone photography tricks that will help you create stunning aerial images and boost your Instagram engagement. Whether you’re a beginner or an experienced drone pilot, these techniques will elevate your photography game and leave your followers in awe.
Shoot in RAW for Maximum Flexibility
One of the most important tips for drone photography is to shoot in RAW format. RAW files contain all the data captured by your drone’s camera sensor, giving you much more flexibility when editing your photos.
Benefits of shooting in RAW:
- Greater control over white balance
- Improved shadow and highlight recovery
- Better color depth and accuracy
- More leeway for exposure adjustments
To get started with RAW photography:
- Check your drone’s camera settings and enable RAW capture.
- Use software like Adobe Lightroom or Capture One to process your RAW files.
- Experiment with different editing techniques to bring out the best in your aerial shots.
Learn more about RAW photography
Master the Rule of Thirds

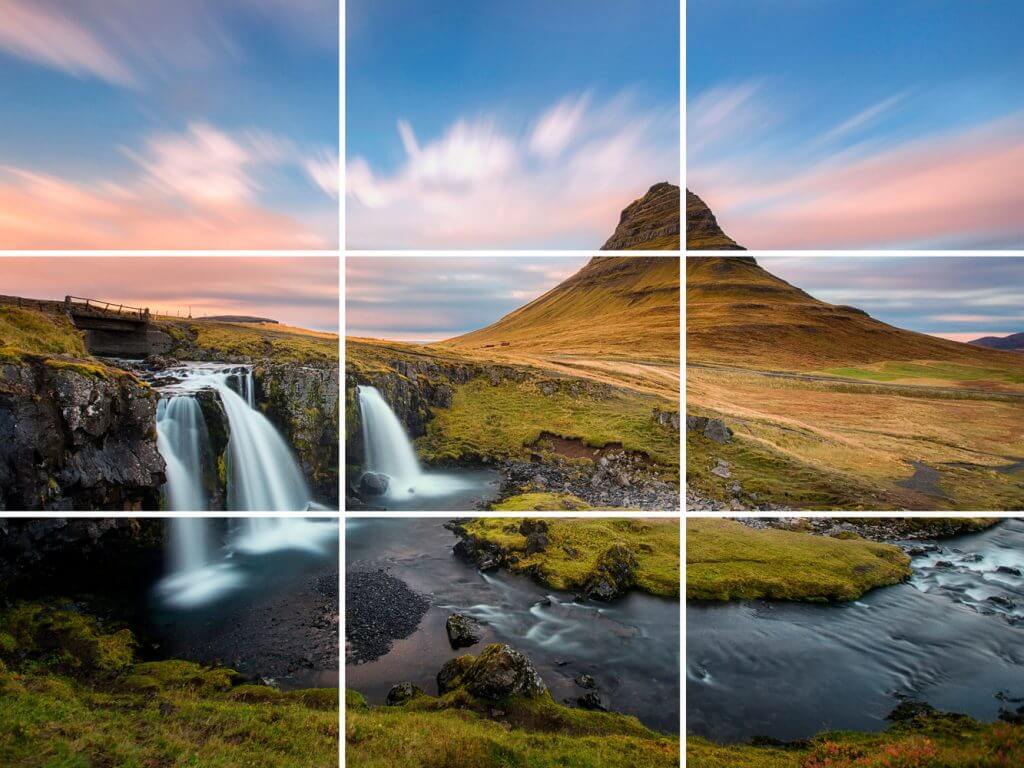
The rule of thirds is a fundamental principle in photography that can dramatically improve your drone shots. By dividing your frame into a 3×3 grid and placing key elements along these lines or at their intersections, you can create more balanced and visually appealing compositions.
How to apply the rule of thirds in drone photography:
- Enable the grid overlay in your drone’s camera app.
- Position your main subject at one of the intersecting points.
- Align horizons along the horizontal lines.
- Place vertical elements along the vertical lines.
Remember, while the rule of thirds is a great starting point, don’t be afraid to break it occasionally for creative effect.
Use Exposure Bracketing for Perfect Lighting
Exposure bracketing is a powerful technique that can help you capture perfectly exposed images, even in challenging lighting conditions. This method involves taking multiple shots of the same scene at different exposure levels and then combining them in post-processing.
Steps to use exposure bracketing:
- Enable the auto exposure bracketing (AEB) feature on your drone.
- Set the number of shots and the exposure range (e.g., 3 shots at -1, 0, and +1 EV).
- Take the series of bracketed shots.
- Combine the images using HDR software or manual blending in Photoshop.
Exposure bracketing is particularly useful for scenes with high contrast, such as sunsets or cityscapes with bright lights and deep shadows.
Choose the Right Time of Day
The time of day you fly your drone can have a significant impact on the quality of your photos. Golden hour, the period shortly after sunrise or before sunset, is often considered the best time for aerial photography.
Benefits of shooting during golden hour:
- Warm, soft light that enhances colors and textures
- Long shadows that add depth and dimension to your shots
- Reduced glare and harsh contrasts
If you can’t shoot during golden hour, consider these alternatives:
- Blue hour (just before sunrise or after sunset) for moody, atmospheric shots
- Overcast days for soft, even lighting
- Night flights for unique cityscapes and light trails (check local regulations first)
Remember to keep the ISO low to minimize noise in your images, especially in low-light conditions.
Create Stunning Aerial Panoramas
Aerial panoramas can offer a breathtaking view of landscapes that’s impossible to capture in a single frame. Many modern drones have built-in panorama modes, but you can also create them manually for more control.
Steps to create an aerial panorama:
- Find a suitable location with an expansive view.
- Set your drone to manual mode for consistent exposure across all shots.
- Take a series of overlapping photos, rotating the drone between each shot.
- Use software like Adobe Lightroom or PTGui to stitch the images together.
- Apply final edits to enhance the panorama’s impact.
When creating panoramas, look for scenes with interesting patterns, symmetry, or contrasting elements to make your images truly stand out.
Conclusion
By implementing these five drone photography tricks – shooting in RAW, mastering the rule of thirds, using exposure bracketing, choosing the right time of day, and creating aerial panoramas – you’ll be well on your way to capturing stunning aerial images that will impress your Instagram followers.
Remember to always fly safely and follow local drone regulations. With practice and creativity, you’ll soon be producing drone photos that stand out from the crowd and generate more engagement on your Instagram feed.
Don’t forget to experiment with filters, both in-camera and during post-processing, to add that extra touch to your drone photos. And most importantly, have fun exploring the world from above!
Learn more about drone photography techniques
What’s your favorite drone photography trick? Share your thoughts and experiences in the comments below, and don’t forget to tag us in your best drone shots on Instagram!
